Sign In
Create Account
{{ (rememberingPassword) ? 'Recover Forgotten Password' : 'Sign In' }}
Create a JBugs Account
{{ notificationText }}
Close
Your cart is currently empty.
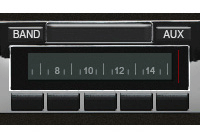
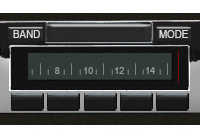
Before you begin you may be wondering which radio is best for you. Use the chart below to compare radio features. All our radios are made to fit the stock cut-out on your dashboard. No need to cut or modify your dash, and radio installation is straightforward without any specialty tools. Radio installation instructions located directly below chart.
Compare |
USA-230 Select |
USA-630 Select |
USA-740 Select |
USA-850 Select |
Slidebar Select |
OE Replica Select |
Secretaudio Select |
|---|---|---|---|---|---|---|---|
| Faces |
 Green/Black LCD |
 Black/White LCD |
 Customize Color of LCD Display |
 DigaDial w/ 4 Display Options |
 Slide to hide or show Black/White LCD display |
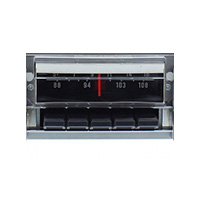 Authentic look matches vehicle. Dial Needle Actually Moves |
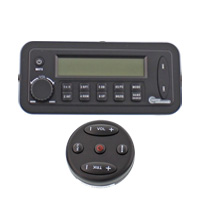 Hidden display can be mounted anywhere in vehicle. Includes remote. |
| Fits In Original Dash Cut-Out | |||||||
| AM/FM | |||||||
| AUX | RCA AUX Rear | RCA AUX Rear | 3.5mm Front & RCA Rear |
RCA AUX Rear | RCA AUX Rear | 3.5mm AUX Rear | RCA AUX Rear |
| PEAK POWER | 200W Peak Power | 300W Peak Power | 300W Peak Power | 300W Peak Power | 300W Peak Power | 300W Peak Power | 200W Peak Power |
| Channels | 4 Channel Amp Pre-Outs | 4 Channel Amp Pre-Outs | 5 Channel Amp Pre-Outs | 5 Channel Amp Pre-Outs | 5 Channel Amp Pre-Outs | 3 Channel Amp Pre-Outs | 4 Channel Amp Pre-Outs |
| Bluetooth | Option to Add Bluetooth | Bluetooth Built In | Bluetooth Built In | Bluetooth Built In | Bluetooth Built In | Bluetooth Built In | |
| USB | Rear USB Cable | Rear USB Cable | Rear USB Cable | Rear USB Cable | Rear USB Cable | ||
| CD PLayer Controls | Option to Add CD Player | Option to Add CD Player | Option to Add CD Player | Option to Add CD Player | Option to Add CD Player | Option to Add CD Player | |
| Subwoofer Pre Out | |||||||
| Radio Face | Faux Radio Face Hides LED Screen | Faux Radio Face Hides LED Screen | Faux Radio Face Hides LED Screen | Faux Radio Face Hides LED Screen | Faux Radio Face Hides LED Screen | Working radio face with moving dial needle | Remote mounted LCD display |
| Standout Features |
|
|
|
|
|
|
|
| Wiring Harness Included? | |||||||
| Manufacturer's Warranty | 2 Years | 2 Years | 2 Years | 2 Years | 2 Years | 1 Year | 2 Years |
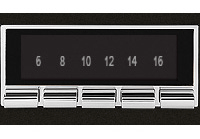
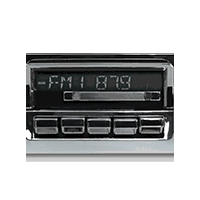
Installation is Simple. Custom Autosound radios were engineered to fit in your stock VW dash with out drilling, cutting or making modifications to your dash. Radios come with year correct face plates to match your vehicle. Although it looks classic, our radios are built with the latest modern features. Radio looks stock when turned off, but once turned on the LED alpha-numeric display lights up behind false radio dial face.


Copyright © JBugs.
All rights reserved. All images protected by US and International copyright laws. No part of this website may be reproduced, distributed, or transmitted in any form or by any means.
All Prices subject to change without notice or obligation. Not responsible for typographical or photo errors. "Volkswagen", "VW","Beetle", "Super Beetle", "Bus", "Ghia", "Type 2", "Type 3", "Thing", "Rabbit", "Cabriolet", "Jetta", and "Golf" are trademarked by Volkswagen of America and are used for descriptive purposes only.
 5-Star Rating!
